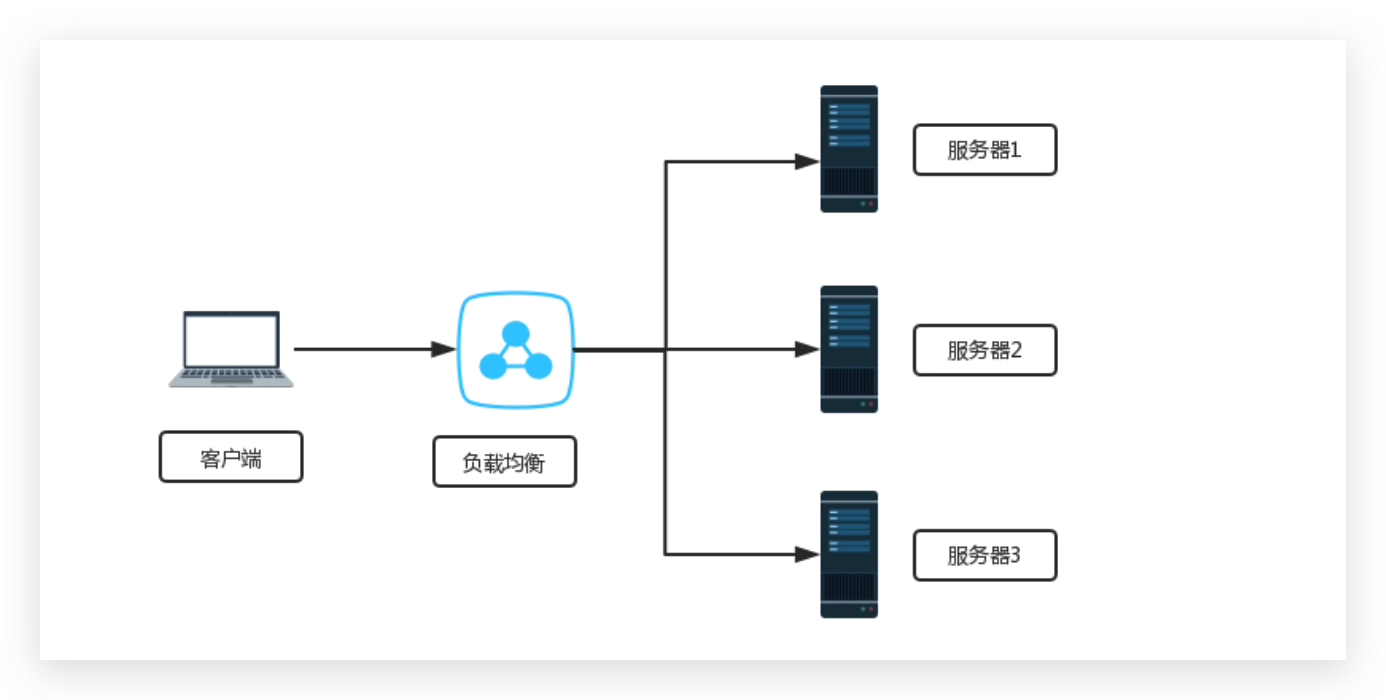
Nginx作用
Nginx 是一个高性能HTTP和反向代理的Web服务器,可以将服务器上的静态文件(如HTML、图片)等通过HTTP协议展现给客户端,占用内存少、并发能力强
安装Nginx
进入nginx官网 (https://nginx.org/en/)
window系统选择下载 .exe
linux系统下载pgp
linux解压缩
1
2
3
| tar zxvf nginx-1.22.1 tar.gz
make
make install
|
如果是使用linux上面 推荐使用apt-get 或者 yum 等 去下载,下载之前请先系统上是否存在nginx
下面演示是在 linux发行版 ubuntu-22.04 使用 apt-get下载的nginx
如果失败请加上sudo
启动Nginx
进入安装好的目录 /usr/sbin
1
2
3
4
5
6
7
| cd /usr/sbin
./nginx
./nginx -s stop
./nginx -s quit
./nginx -s reload
./nginx -t
ps -ef|grep nginx
|
Nginx的目录
Nginx一般安装在/etc/nginx目录下(安装时–prefix可指定安装目录)
1
2
3
4
5
6
7
8
9
10
11
12
13
14
15
| conf #配置文件
|-nginx.conf # 主配置文件
|-其他配置文件 # 可通过那个include关键字,引入到了nginx.conf生效
html #静态页面
logs
|-access.log #访问日志(每次访问都会记录)
|-error.log #错误日志
|-nginx.pid #进程号
sbin
|-nginx #主进程文件
*_temp #运行时,生成临时文件
|

Nginx配置
简化版的Nginx.conf
1
2
3
4
5
6
7
8
9
10
11
12
13
14
15
16
17
18
19
20
21
22
23
24
25
26
27
28
29
30
31
32
33
| worker_processes 1; # 启动的worker进程数
events {
worker_connections 1024; #每个worker进程的连接数
}
http {
include mime.types; #include是引入关键字,这里引入了mime.types这个配置文件(同在conf目录下,mime.types是用来定义,请求返回的content-type)
default_type application/octet-stream; #mime.types未定义的,使用默认格式application/octet-stream (指浏览器)
sendfile on; #详情,见下文
keepalive_timeout 65; #长链接超时时间
#主机
#一个nginx可以启用多个server(虚拟服务器) -vhost
server {
listen 80;#监听端口80
server_name localhost; #接收的域名,主机名
#http://localhost.com/xxoo/index.html
#可以存在多个location 互相不干扰
location / {
root html; #根目录指向html目录
index index.html index.htm; #域名/index 指向 index.html index.htm文件
}
#http://localhost.com/50x.html
error_page 500 502 503 504 /50x.html; # 服务器错误码为500 502 503 504,转到"域名/50x.html"
location = /50x.html {# 指定到html文件夹下找/50x.htm
root html;
}
}
}
|
sendfile
打开sendfile,用户请求的数据不用再加载到nginx的内存中,而是直接发送

Nginx配置使用场景
修改Nginx配置文件后,记得重新加载nginx
不同二级域名,映射到不同静态网页
可以写多个server字段,从前向后匹配,先匹配到那个就用那个
用户访问pro.hedaodao.ltd,就会走到第一个server配置;test.hedaodao.ltd走到第二个配置
1
2
3
4
5
6
7
8
9
10
11
12
13
14
15
16
17
18
19
20
21
22
23
24
25
26
27
28
29
30
31
32
| http {
#....其他属性
server {
listen 80;
server_name pro.hedaodao.ltd;
location / {
root html/pro;
index index.html index.htm;
}
error_page 500 502 503 504 /50x.html;
location = /50x.html {
root html;
}
}
server {
listen 80;
server_name test.hedaodao.ltd;
location / {
root html/test;
index index.html index.htm;
}
error_page 500 502 503 504 /50x.html;
location = /50x.html {
root html;
}
}
}
|
不同域名,映射到同一静态页面
server_name
1
2
3
4
5
6
7
8
9
10
11
12
13
14
15
16
| http{
server {
listen 80;
server_name *.hedaodao.ltd ~^[0-9]+\.hedaodao\.ltd$; # "\."是转译"."
location / {
root html/test;
index index.html index.htm;
}
error_page 500 502 503 504 /50x.html;
location = /50x.html {
root html;
}
}
}
|
反向代理与负载均衡
反向代理:这种代理方式叫做,隧道代理。有性能瓶颈,因为所有的数据都经过Nginx,所以Nginx服务器的性能至关重要

负载均衡:把请求,按照一定算法规则,分配给多台业务服务器(即使其中一个坏了/维护升级,还有其他服务器可以继续提供服务)

反向代理+负载均衡
nginx.conf配置文件
启用proxy_pass,root和index字段就会失效
proxy_pass后的地址必须写完整 http://xxx,不支持https
当访问localhost时(Nginx服务器),网页打开的是http://xxx(应用服务器),网页地址栏写的还是localhost
1
2
3
4
5
6
7
8
9
10
11
12
13
14
15
16
17
| http{
server {
listen 80;
server_name localhost;
location / {
proxy_pass http://xxx;
#root html/test;
#index index.html index.htm;
}
error_page 500 502 503 504 /50x.html;
location = /50x.html {
root html;
}
}
}
|
定义地址别名
使用upstream定义一组地址【在server字段下】
访问localhost,访问都会代理到192.168.174.133:80和192.168.174.134:80这两个地址之一,每次访问这两个地址轮着切换(后面讲到,因为默认权重相等)
1
2
3
4
5
6
7
8
9
10
11
12
13
14
15
16
17
18
19
| http{
upstream httpds{
server 192.168.174.133:80; #如果是80端口,可以省略不写
server 192.168.174.134:80;
}
server {
listen 80;
server_name localhost;
location / {
proxy_pass http://httpds;
}
error_page 500 502 503 504 /50x.html;
location = /50x.html {
root html;
}
}
}
|
设置权重
访问使用哪个地址的权重
1
2
3
4
| upstream httpds{
server 192.168.174.133:80 weight=10;
server 192.168.174.134:80 weight=80;
}
|
关闭
1
2
3
4
| upstream httpds{
server 192.168.174.133:80 weight=10 down;
server 192.168.174.134:80 weight=80;
}
|
备用机
如果192.168.174.133:80出现故障,无法提供服务,就用使用backup的这个机器
1
2
3
4
| upstream httpds{
server 192.168.174.133:80 weight=10;
server 192.168.174.134:80 weight=80 backup;
}
|
Nginx 的一些报错
nginx: [error] invalid PID number “” in “/run/nginx.pid”
解决办法
1
2
| nginx -c /etc/nginx/nginx.conf
nginx -s reload
|
could not open error log file: open() “/usr/local/nginx/logs/error.log” failed (13: Permission denied)
解决办法
在指令前面加上 sudo


